
FM-250 and FM-250S Troubleshooting Guide
FM-250(S) Machine Maintenance Checklist
Here’s what your FungoMan needs at least 3X a year:
- Tire Pressure Check
- Throwing Alignment Check
- Compressor Check
Why is my machine disconnecting from the Wireless Controller?
- A brownout has occurred. A brownout is where there is a brief interruption in power causing the Wi-Fi system to reset, disconnecting from the machine and forcing the user to reconnect the wireless controller to the Wi-Fi.
- The machine is too far away from the wireless controller. Older Wi-Fi systems have known issues of disconnecting when walking into the outfield.
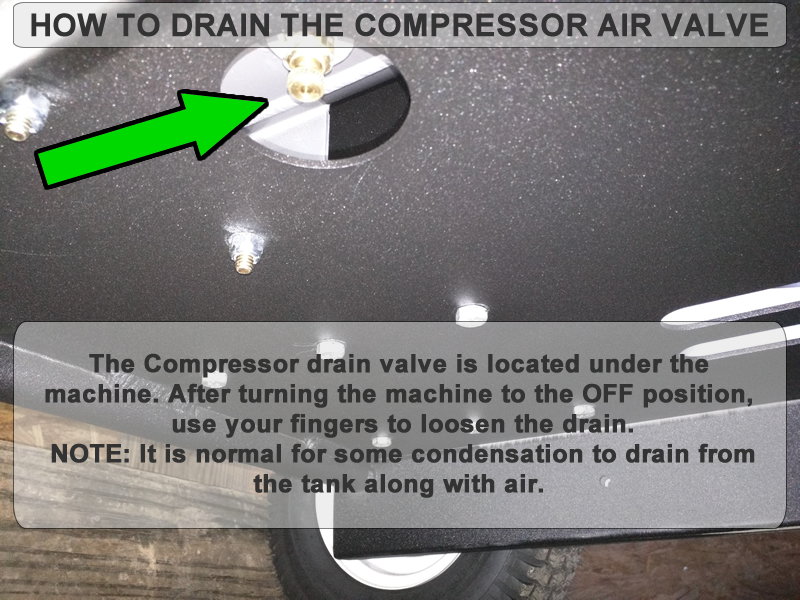
How do I drain the Air Tank?
- Power down the machine.
- Loosen the air tank drain valve until air dispels from the tank.
- Power on the machine.
- The compressor should begin “cycling”.
How are balls thrown?
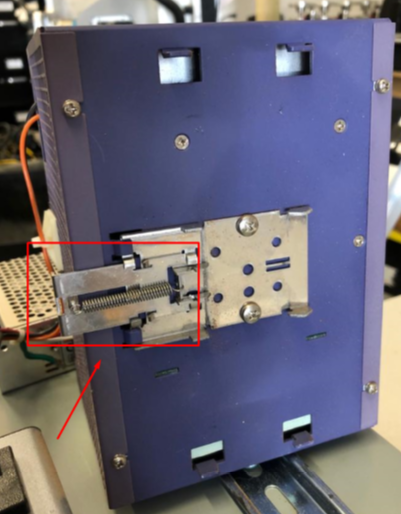
How do I adjust the limit switch on the Gen 2 Throwing Mechanism?
How do I inspect the Light Assembly Wiring?
How do I remove the Ball Feeder Assembly?
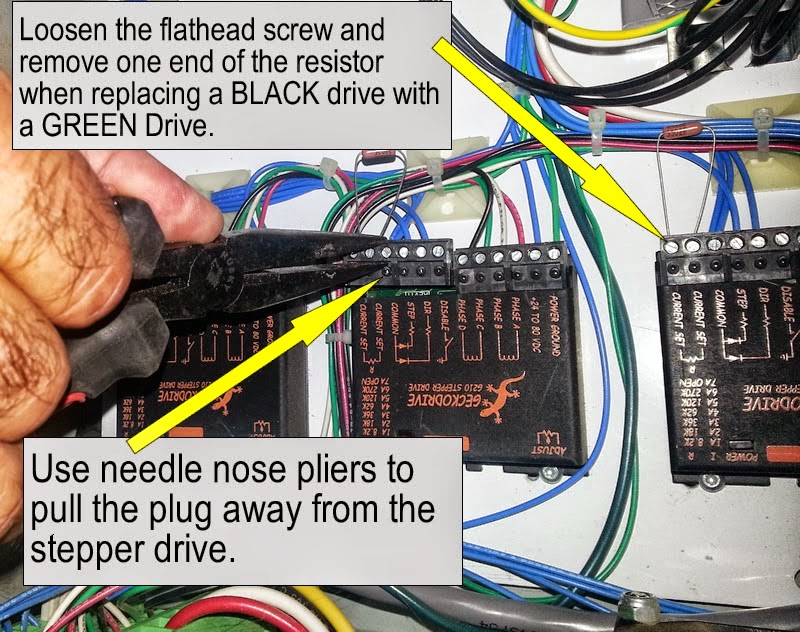
How do I remove a Stepper Drive?
Inspecting the electrical box wiring harness plug
How do I remove the Manual Controller?
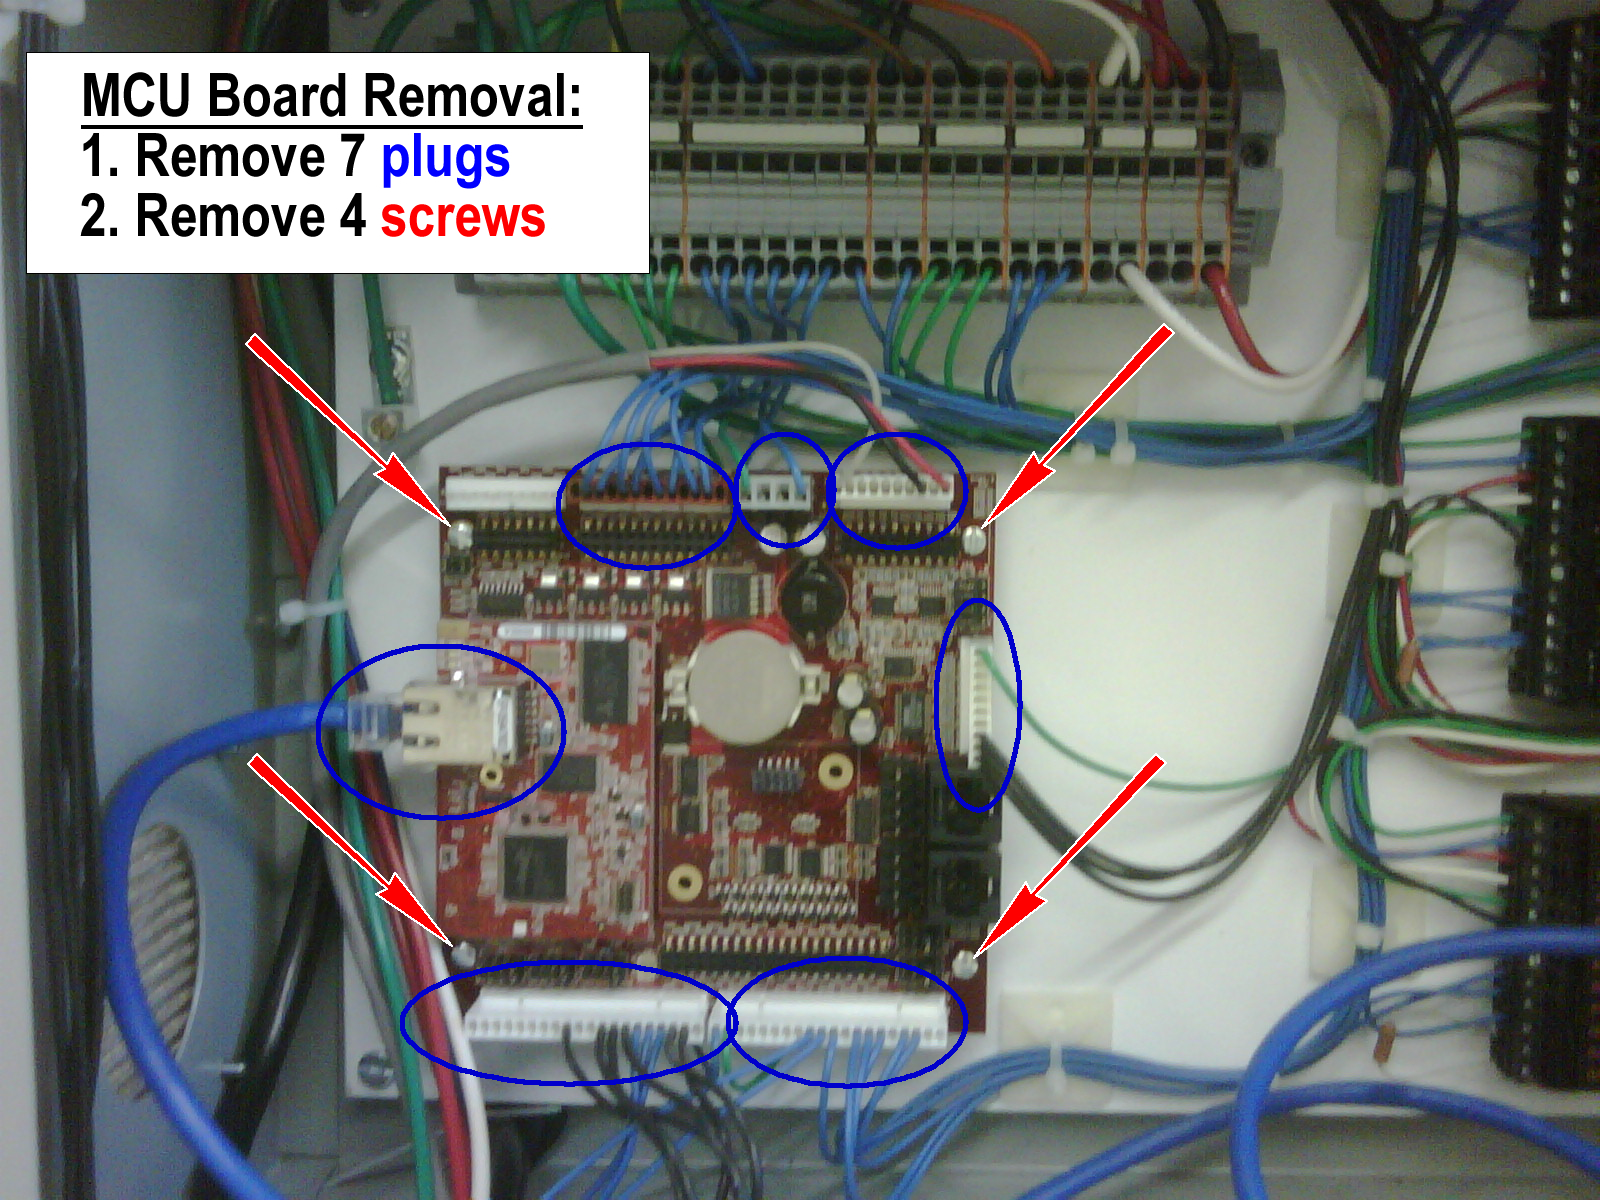
How do I remove the MCU Board?
Please use the link below for instructions on how to remove the MCU board.
How do I remove the throwing wheel motor?
Please view the video in the link below for instructions on how to remove the throwing wheel motor.
How do I remove the Air Compressor?
Removing the Air Compressor Part 1:
Removing the Air Compressor Part 2:
Please follow the instructions below for removing the air compressor.
- Drain air tank.
- Remove the outer cover of the machine by starting with the rear access cover just above the on/off switch of the machine.
- Pay very close attention to this. There are 2 bolts underneath the electrical enclosure, loosen one on the underside of the frame which the enclosure sets on and remove the bolt.
- Pull the enclosure slightly out of its normal position to provide enough room to remove the compressor.
Remove the 4 bolts that attach the compressor to the frame. - Remove the long plastic air tube attached to the compressor by pressing the small black ring forward while pulling the tube out.
- Unplug the compressor from the 3 tab power strip.
- Remove the compressor from the machine by slowly lifting the compressor, angling it back and forth so as not to pinch any wires or tubes.
How do I repair an Air Line?
Please view the video in the link below for instructions on how to repair the air line.
How do I replace the plug on the FungoMan Extension Cord?
Please see the attached photo of the plug that needs to be purchased.
How do I splice wires using the quick connectors?
How do I test the DC Drive?
How do I test the throwing motor?
- Inspect the black bushings (little black plugs located at the end of the motor) and white wire plugs (plugged into the motor wire) to ensure they’re tight and secure with no wire damage.
- View the videos in the links below for instructions on how to test the throwing motor.
Video 1
How do I remove the air hose from the Valve?
Please follow the instructions on the following link to replace the air line in the valve.
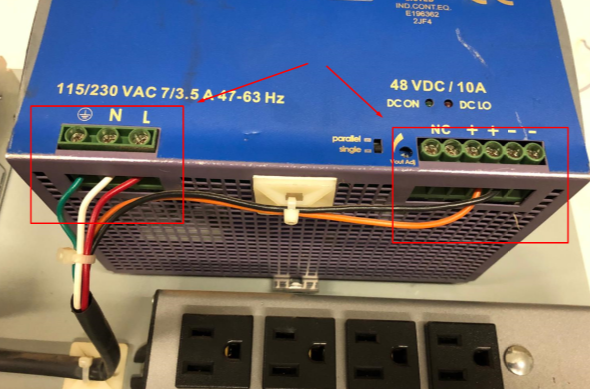
How do I install the 48v power supply?
Please follow these instructions for both removing and installing the electrical enclosure and 48v power supply.
- Remove the electrical enclosure from your machine.
- Use a flat head screwdriver to release the silver locking clip.
- Take a picture of the power supply and wiring configuration.
- Use a Phillips head screwdriver to loosen each screw until wire releases.
- Repeat this process for all 5 wires.
- Remove the old power supply
- Install the new power supply.
- Re-install wires in the following order:
black
orange
red
white
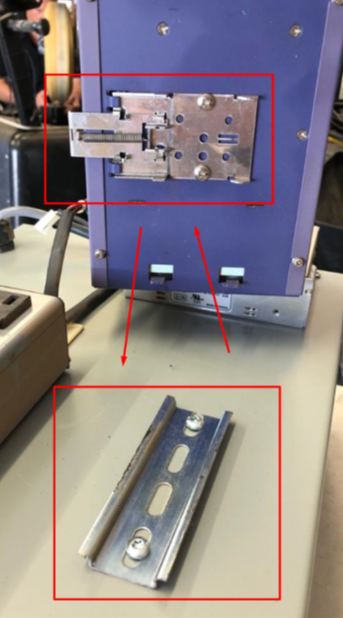
green - Mount the power supply on the din rail (as seen below).
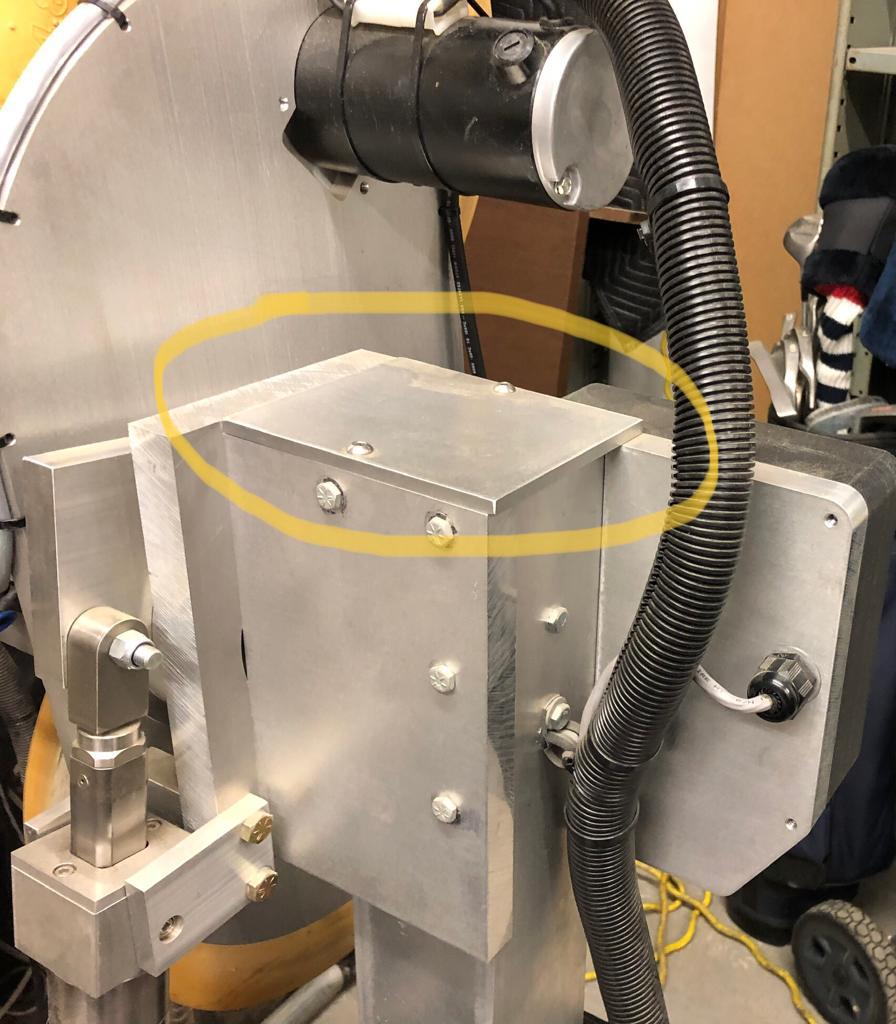
How do I remove the top plate?
The top plate is attached with two or four screws that need to be removed to release.
How do I use the manual override button on the Throwing Mechanism?
Please follow the instructions below and in the video to test the Throwing Mechanism using the Manual Override Button:
Performing the manual override test
- Manual Override Test:
With the machine off, drain the Air Compressor - Remove Throwing Mechanism Cover
- Identify the Manual ‘Override Button’ on the Throwing Valve
- Clear ball out of the “Pinch Point’ area
- Power machine on, allow the air compressor to be full (air cycle finished)
- Press the override button to test if the Piston is working through the valve in order to fire the Piston
Once you complete the manual override test:
- Make sure the machine is turned off.
- Drain air compressor.
- Take needle nose pliers and manually pull the air cylinder rod out.
- Using your hands, push it back in, and then pull it back out. What you’re looking for here is to see how smoothly that air cylinder rod is moving. If you experience any resistance, that means that the air cylinder rod is bent and needs to be replaced.

How do I adjust the Throwing Fingers?
Please follow these instructions in order to adjust the throwing fingers:
- Turn the machine off
- Clear all balls from the pinch point (where the ball is about to be fired)
- Using the image below as a reference, please adjust both the bottom and top fingers to be in alignment with the ball chute.
Can I purchase FungoMan replacement parts online?
Replacement parts can be purchased at the FungoMan Online Store
How do I apply Lithium Grease Under the Position Axis?
Why does my machine shut down in the middle of a routine and then show me a message saying "Timer Reached?"
- How to properly exit the app: Always press the red “F” at the top left of the screen, when going back to a previous page, or to exit the app completely.
- Locate the white square on the wireless controller next to the Home button. Press the white square and close all apps that are running. This will ensure that you don’t have two instances of the app running at the same time.
- Execution of a routine: Press base path>routine>play tab>select 1st ball>press throw> then press play to automate. The emphasis is on pressing the “throw” button first, before automating a routine.
For Additional Information or Assistance
Please submit a case using the button below and our customer care manager will follow up in the order that it was received.